The Velcro straps on the lower ends of the shoulder straps make changing the shoulder strap length quick and easy. The length of the shoulder straps should be sized approximately so that the point at which the corrugated inflator tube attached to the wing bladder is between the shoulder blades so that it can be reached easily by hand.


The D-rings threaded on the shoulder straps should be positioned at the level of the underarm. Attention should be paid to the same position and belt length of the right and left sides. The belt length should now be sized so that it is easy to put on and take off the system. Since we attach great importance to maximum robustness and a simple structure of the system, we have deliberately avoided additional padding of the components. When diving in warm waters, we recommend wearing a 3mm neoprene shirt at least on the upper body to avoid pressure points in the shoulder area.
The design was frankly, brilliant. It was also rugged and easy to disassemble
Bill Stone (United States Deep Caving Team Director)
Habe schon vieles gesehen und getestet aber das überzeugt mich
Kevin Marks
Really no kidding, this is the best system I ever used!!!! And the quality is amazing.
Luis Augusto Pedro IANTD HQ
When delivered, the compression of the carabiner side of the chest strap rubber for individual length adjustment is not yet performed. This can be done by the user himself using the following steps. Determine the length of the system while wearing (clothing: T-shirt or thin sweater, etc.). Tighten the chest strap to the point of light tension. This length is usually sufficient for all purposes, since the rubber can adapt to all suit combinations by stretching. Mark the position, remove the system and place it on a suitable surface.
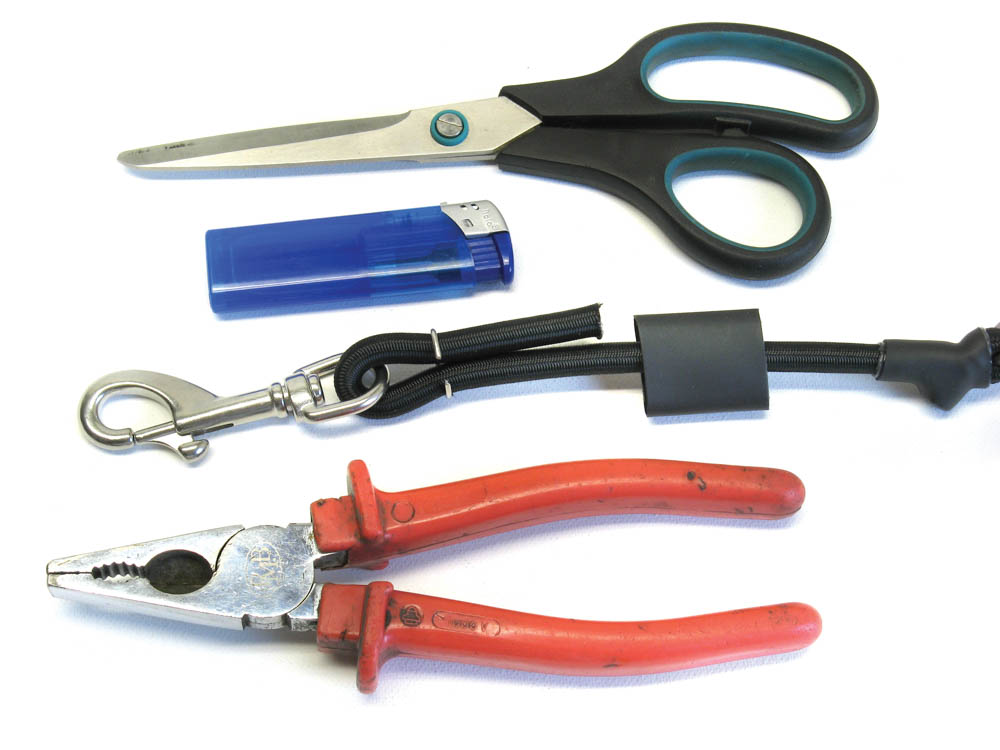
Then loosely push the wire staple to the carabiner and check and adjust the length of the rubber. Shorten the rubber parts by cutting them to about 1 cm behind the wire staple. Briefly heat the sheathing of the rubber rope with the flame of a lighter to fuse the fibers and thus prevent fraying.
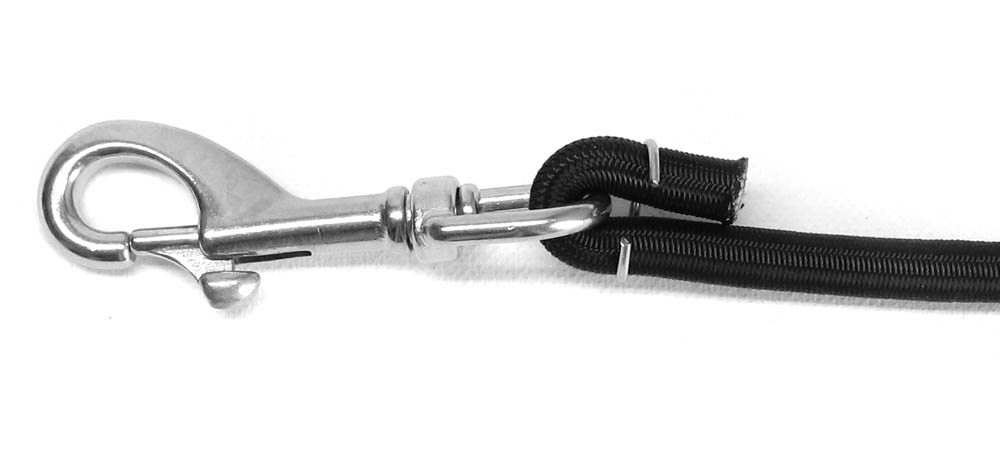
Then with suitable pliers bend the wire staple firmly together.

It is important to make sure that the wire tips are not sticking out laterally, but pressed into the rubber cord.

In the last step, the heat-shrink tubing is slid over the metal and met with a hot-air blower or lighter until the tube contracts tightly. Take care to ensure that only the heat shrink tubing comes into contact with the heat, otherwise the adjoining braid of the cover can be damaged!


The waist strap should now enclose the body slightly below the waist. Since the center is determined by the pressed eyelet and the position of the central screw, the length adjustment must be done on both sides. On the left side of the belt length can be easily changed by moving the belt buckle. The right side of the strap should then be adjusted so that there is no excessive protrusion of the strap behind the buckle when it is closed. We recommend a projection of max. 15 cm. After cutting the strap, seal the edges. This can be done with a lighter or a belt cutter.
The waist strap should be pulled relatively tight when standing, as it gets more scope under water in a horizontal diving position.
The two asymmetric d-rings (attachment point 2) should be positioned so that they are just below the wing, where they can still be easily reached by hand.

The two low-profile D-rings should be positioned so that they sit approximately over the anterior ends of the pelvic bones (iliac crest).
The tri-glide with the narrow oval eyelet for guiding the elastic band to the wing tightening should be positioned so that it sits as far forward as possible in the direction of the low-profile D-ring. As a result, a maximum expansion range can be achieved. Of course, it must not obstruct the operation of the bottle attachment points in any way.
The tension of the elastic band is now to be regulated so that, when the waist strap is open, there is approximately a margin of 2 finger widths between the elastic band and the relaxed waist strap. If the waist strap is tensioned, the tension on the wing is increased by this amount.
If the tension is too great, the elastic band can break loose from the Velcro fastener on the wing shell.

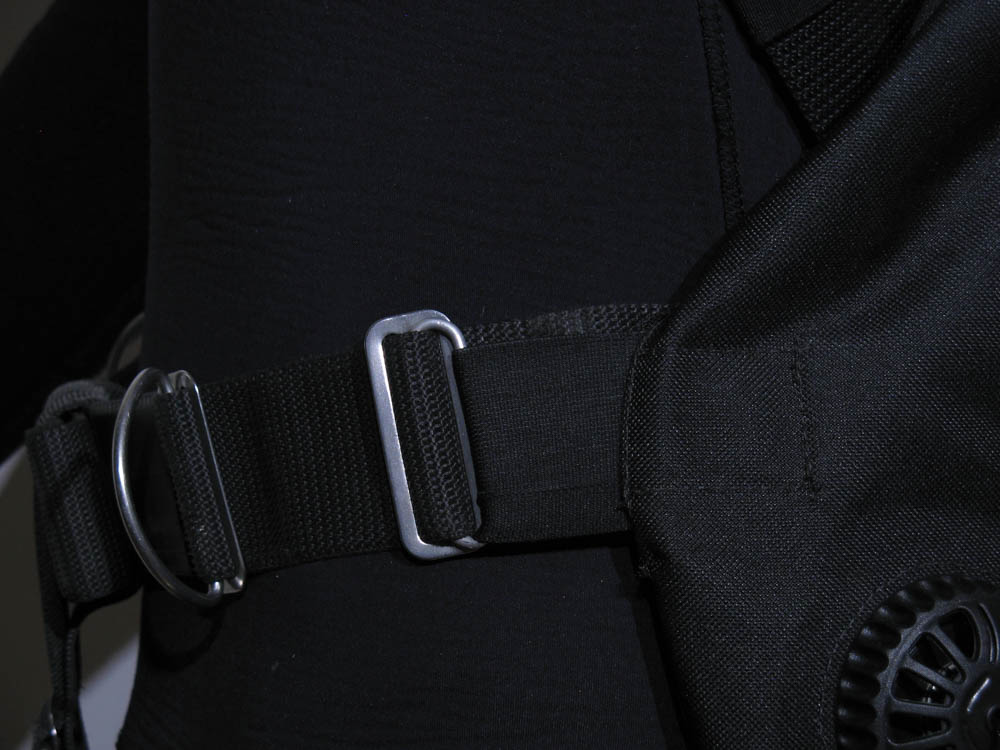
If the tension is too loose, the wing is not stretched enough and it is no longer held close to the diver’s body in the water.
After determining the shoulder and waist straps, the crotch strap can be adjusted. This should be tightened so that there is a maximum of 2 finger-wide clearance between crotch strap and body when wearing the system. The crotch strap is designed to prevent the system from shifting longitudinally on the body of the diver, therefore avoid too loose a seat.
The TS system offers several options for accommodating tare weights. The fastest and easiest way is by mounting a standard P-weight in the middle fold of the inner backplate. Fastening is done by screwing with the two central screws (M8). Commercially available P-weights are between 2.5 and 6 kg, they are available as separate accessories.
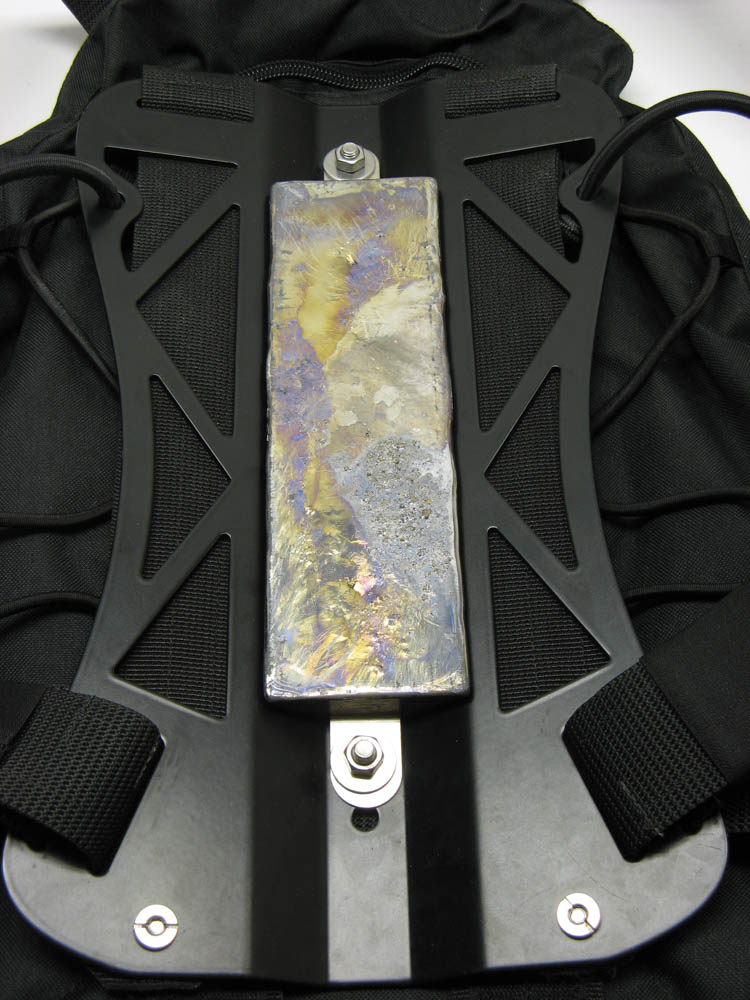
Another option is to load the webbing weight system on the back of the inner backplate. After opening the two central screws, the inner backplate can be raised and turned over. After opening the Velcro fastener, the webbing can be threaded out of the upper slot. Now commercially available lead belt weight pieces can be threaded onto the straps. The maximum capacity is 4 pieces of lead per side, but this also depends on the shape and size of the pieces of lead, which can vary widely. Positioning and arranging the lead pieces can influence the weight balance (trim) of the diver. Head or foot load can be compensated. Also asymmetric weight distribution is possible to compensate for unequal diving equipment on the right and left side.
This can be of great help especially when diving with rebreather (sidemount-CCR).

The placement of lead weight pieces on the webbing increases the distance from the inner to the outer back plate, therefore an adjustment of the central screws is necessary. The scope of delivery includes various screw lengths (M8x40, M8x50, M8x60, M8x70) to allow for optimum adaptation.
The last step is to adjust the length of the two sidemount bungees. With arms outstretched horizontally and with the TS system properly set up, the length of the bungee should be such that it runs in a slight curve below the armpit. The maximum distance of the bungee to the armpit should be about 4 finger widths (8-10 cm).
The length adjustment is done by placing a simple overhand knot in the rubber rope behind the hole provided by the inner back plate, while making sure that there is still a rope projection of at least 5 cm behind the node to prevent loosening of the knot.
Through the knot, the sidemount bungee is quickly adjustable in length to make individual changes for different divers or different conditions (thick suit, thin suit, etc.).
This should be considered as a provisional benchmark. It is assumed that the bottle is assembled according to the procedure described in the following chapter. Other types of installation are possible, in any case, a close-fitting and horizontal, body-parallel bottle position should be sought.


